How to Get Into Hunting: A Complete Beginner’s Guide From Zero to Your First Season
You don’t need a hunting family, a camo wardrobe, or a truck full of gear. You need a plan, a little patience, and the right people. Here is the whole path, one step at a time.
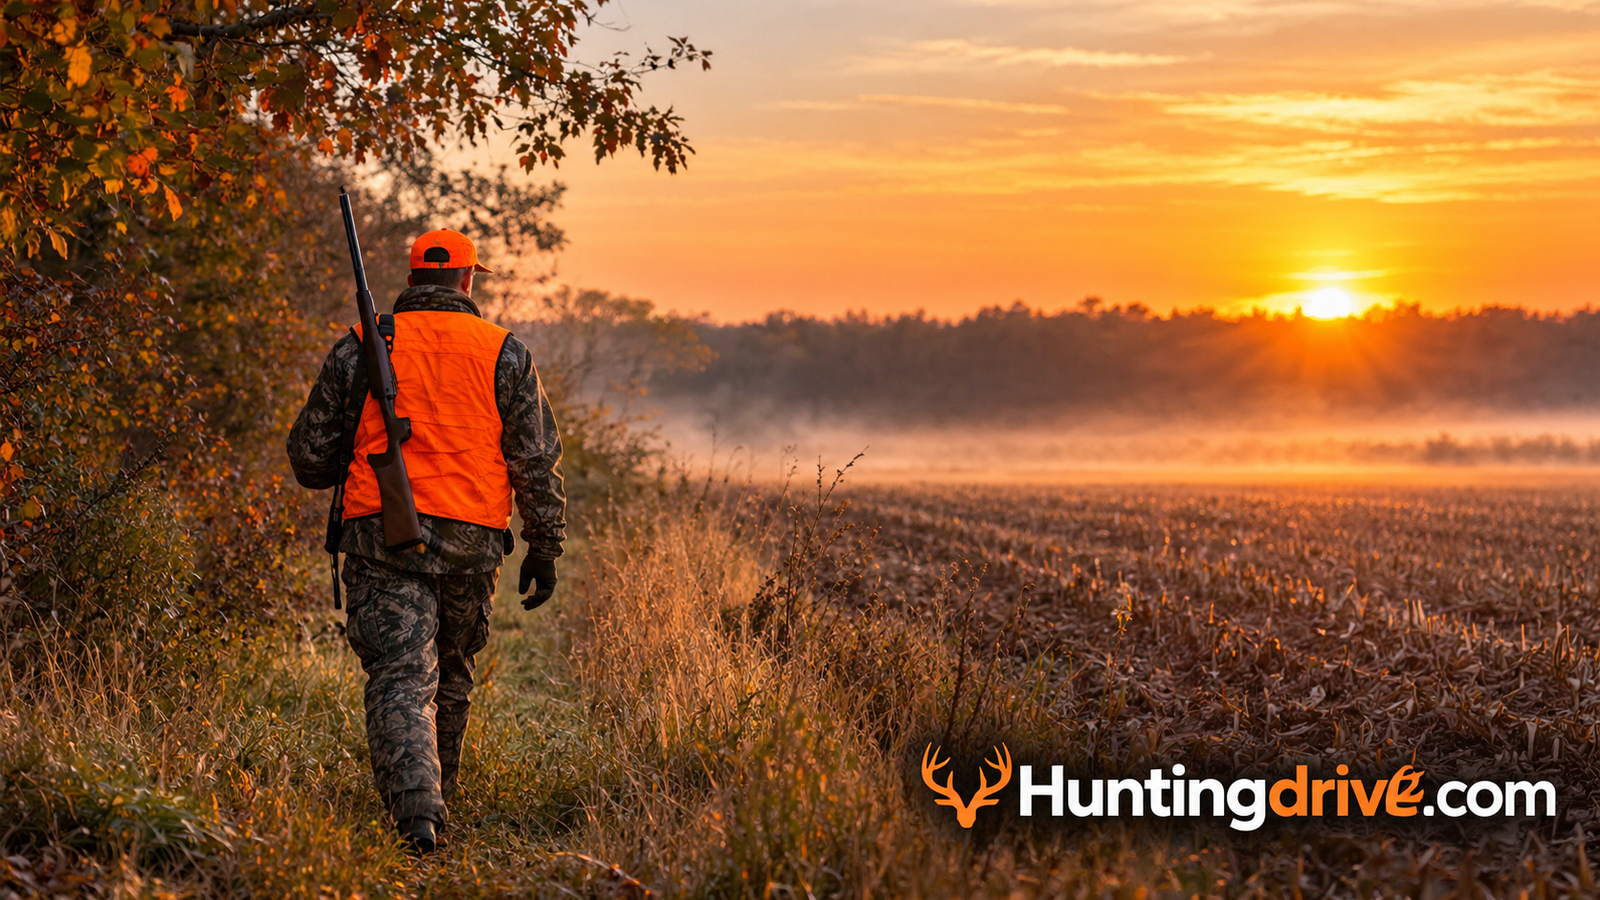
Most people who start hunting as adults share the same story. They grew up around it, or they ate a wild-caught meal that changed how they think about food, or a friend invited them out once and they never quite stopped thinking about it. And then comes the second part of the story: they didn’t know where to start, so they waited longer than they wanted to.
The truth is that learning how to get into hunting is mostly a matter of order. Do the paperwork before you buy gear. Find a person before you find a place. Learn to shoot before you ever sit in a stand. Pick a forgiving first species. Get the meat home and cooked. Do these things in the right sequence and the whole thing stops feeling like a locked door.
This guide walks through that sequence in twelve parts, with a diagram for each step so you can picture what you’re doing before you do it.
Decide Why You Want to Hunt (and What Kind of Hunting Fits You)
Before you buy anything or sign up for anything, spend a week being honest about your reasons. People come to hunting for different reasons, and the reason you land on shapes almost every decision after it: what you hunt, what you carry, where you go, and how much time you’ll need.
Some people want meat. They’re tired of not knowing where their food comes from and want to take responsibility for at least part of it. Others want a reason to be outside before sunrise with a purpose. Some want a skill that feels old and real: tracking, calling, reading wind, shooting a bow. Others are drawn by the social side, a camp, a dog, a standing invitation every fall with the same three friends. Plenty of people want all of it at once, and that’s fine.
Be honest about your constraints
Time is the one nobody accounts for. Deer hunting can eat entire weekends. Dove hunting can be a couple of hours on a Saturday afternoon. Waterfowl means pre-dawn alarms and wet gear. Squirrel hunting fits into a lunch break on a good day. If you have a full-time job and young kids, the version of hunting that fits your life is different from the version someone retired would choose.
Money matters too, though less than people fear. You can start with a borrowed shotgun and a modest set of clothes. You’ll learn what you actually need by doing, and a lot of expensive gear turns out to be unnecessary. Be wary of any advice that starts with a shopping list.
Finally, think about how you feel about the whole act, not just the idea of it. Hunting involves killing an animal, cleaning it, and eating it. Some people discover that part is more meaningful than they expected. Others find it isn’t for them. Both outcomes are valid, and it’s much better to find out through a calm first experience, like helping a friend process game or going on a mentored hunt, than after you’ve spent a fortune.
A simple starting question
Ask yourself: what would a successful first season look like? For some people it’s one clean harvest. For others it’s simply spending ten mornings outdoors, learning the land, and seeing animals. Setting a modest, realistic goal takes pressure off and keeps you from quitting after the first quiet sit.
Rule of thumb: Pick one species and one method for your first year. Depth beats breadth. Learn how that animal lives, moves, and reacts, and everything else will make more sense later.
Take Hunter Education and Get Properly Licensed
This is the step that feels like homework, and it’s also the step that protects you. In most places, anyone hunting for the first time has to complete a hunter education course before they can buy a license. The details vary by state or province, so your first stop should be the website of your state’s fish and wildlife agency. Search for “hunter education” plus your state, and you’ll find the current requirements, course formats, and fees.
What a hunter education course covers
You’ll learn safe firearm and bow handling, basic wildlife identification, shot placement, ethics, hunting laws, survival basics, and what to do if something goes wrong. Courses are usually offered as a blend of online study and an in-person field day, or entirely in person. Many are inexpensive or free. Treat the course as real preparation rather than a box to tick. The field day is often the first time a new hunter shoulders a firearm under supervision, and it tends to be where common beginner mistakes are caught.
Licenses, tags, and stamps
After the course, you’ll typically buy a basic hunting license. Many places also require separate tags or permits for specific animals, and stamps for things like migratory waterfowl. Some require a harvest report afterward. Seasons, bag limits, legal hours, and allowed methods are all set by the agency, and they change often enough that you should always check the current regulations before each season rather than rely on what a friend remembers.
If you’re curious how deer season timing works in general, our guide to when deer hunting season is breaks down how those windows are usually organized by weapon type, and why dates differ so much from place to place.
Know the other rules too
- Legal shooting hours: usually tied to sunrise and sunset, and sometimes different for each species.
- Hunter orange requirements: mandatory in many places for certain seasons and weapons.
- Transport and tagging rules: how and when to attach a tag, and how to carry an animal home.
- Disease and carcass rules: some regions restrict moving carcass parts or require testing.
- Land rules: public land often has its own regulations on top of state ones.
Always verify locally. Regulations are published by your state or provincial wildlife agency and are the only authority that counts. Read the current digest before you hunt, every year.
Find a Mentor (the Single Biggest Shortcut)
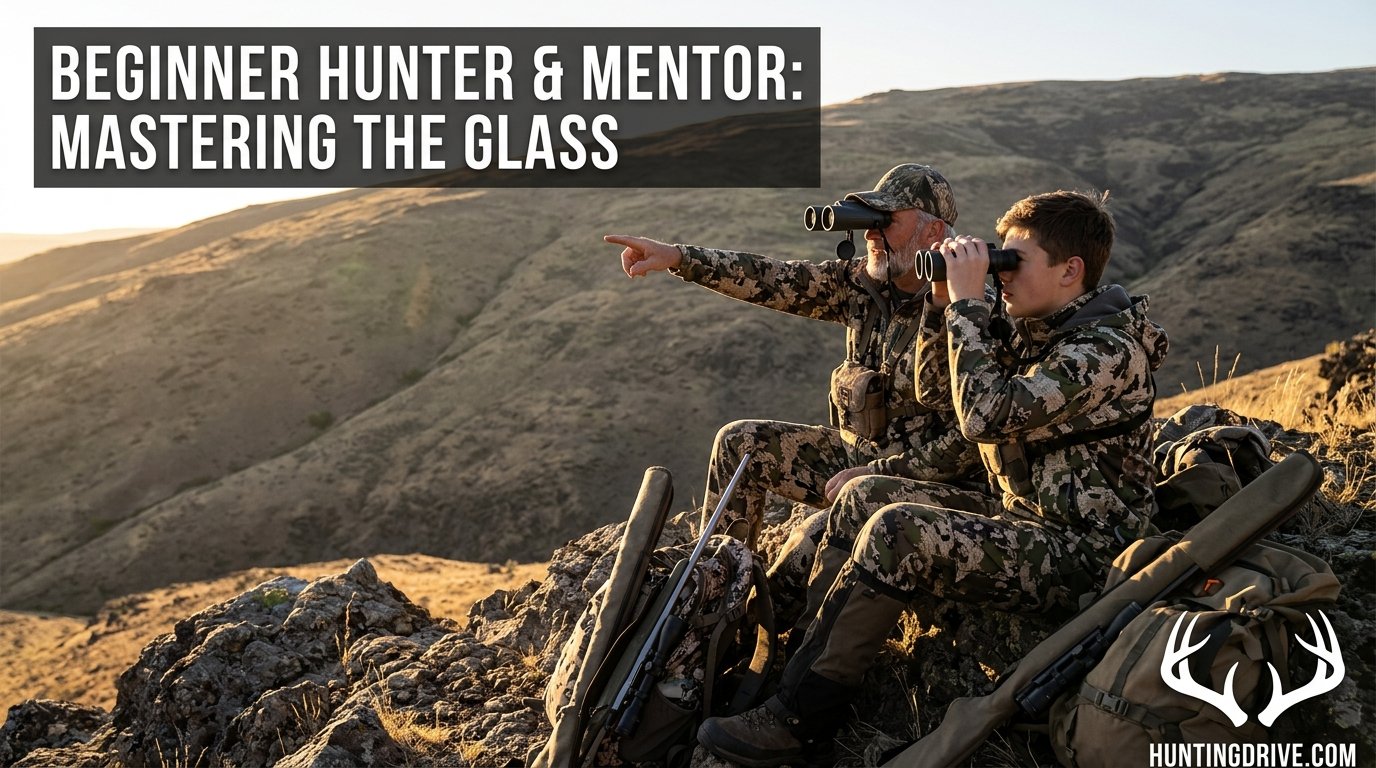
If there’s one piece of advice that separates people who stick with hunting from people who quit after one season, it’s this: find someone to learn from. Hunting is a craft, and crafts are learned best next to someone who already does them. A mentor can compress years of trial and error into a few outings. They can tell you why a particular ridge holds animals, why you should leave the truck two hours earlier than you planned, and what the weird sound in the woods actually was.
Where to find one
- Your state wildlife agency: many run mentored hunts, apprentice programs, and “learn to hunt” events specifically for adults.
- Conservation groups: local chapters of waterfowl, turkey, deer, and grouse organizations often host beginner days and welcome new members.
- Gun clubs and shooting ranges: range officers are usually happy to talk, and clubs often have members who hunt.
- Local sporting goods and archery shops: staff tend to know who in the area takes newcomers out.
- Friends, coworkers, and family: ask. Many hunters are delighted to take someone out and just never thought you’d be interested.
- Online communities: regional forums and groups can lead to in-person connections. Use common sense and meet in public first.
How to be a good mentee
Show up early. Offer to buy lunch or gas. Carry something. Do what you’re told in the field without argument, especially around safety. Ask questions after the hunt rather than whispering through it. Share the work afterward: help with dressing, packing, and processing. A mentee who’s reliable and humble gets invited back, and tends to get introduced to better spots and better people over time.
If you can’t find a person right away, don’t let that stall you. Start with the hunter education course, join a club, learn to shoot, and keep asking. Most people find a mentor because they kept showing up where hunters gather, not because they found a perfect match on day one.
Choose a Forgiving First Species and Season
Not every animal makes a good first hunt. Some are forgiving: they’re abundant, the seasons are long, the cost to start is low, and mistakes don’t cost you the whole year. Others are famously humbling. Choosing wisely makes your first season much more likely to be fun, and fun is what keeps you coming back.
Species that tend to suit beginners
| Game | Why it works for beginners | Watch out for |
|---|---|---|
| Squirrel | Plentiful, long seasons, short outings, light gear. Great for learning woodcraft and gun handling. | Requires quiet movement and patience. Clean shots matter. |
| Rabbit | Walk-up hunting is simple and social. Often hunted with a friend or a dog. | Dense cover can create unsafe shooting angles. Know exactly where everyone is. |
| Dove | Fast action, often on private fields or managed public areas. Low-pressure intro to shotgunning. | Shots are quick and moving. Expect to miss a lot at first. |
| Upland birds | Walking, dogs, and a great social tradition. Plenty of public-land options. | Dogs and cover matter. Fitness helps. |
| Turkey | Exciting, interactive, and well-supported by calling guides and mentors. | Sharp eyes and a steep learning curve. Expect some empty mornings. |
| Deer | Widespread, rewarding, and plenty of meat. Many regions offer extended seasons and multiple weapon choices. | Requires scouting, patience, and a plan for field dressing and processing. |
If you’re curious about bird hunting with dogs, our overview of what upland hunting is explains the style, the typical birds, and what a first outing looks like. If deer is your target, spend time understanding how your region structures its seasons. Archery, muzzleloader, and firearm windows differ, and each has its own tradeoffs.
Matching species to your life
If you live near public land that gets heavy pressure, small game and doves are a gentle way to learn it without stress. If you have flexibility on weekdays, deer and turkey become more realistic because you can avoid crowds. If a friend runs bird dogs, upland might be the easiest door into the sport. There’s no wrong first choice, only a choice that fits you right now.
Also check when the season for that animal actually opens in your region. Some seasons are short and fall quickly; others stretch for months. Working backward from the season start tells you how much time you have to complete your course, practice, and prepare.
Choose a First Weapon and Learn to Shoot It Well
Your first weapon should match your first species, your budget, and your comfort level. It should also be something you can shoot accurately and safely. A modest firearm or bow you’ve practiced with for months beats an expensive one you barely understand. Whatever you choose, plan on spending real time at a range or practice area before opening day.
Comparing the main options
| Weapon | Best for | Learning curve | Beginner note |
|---|---|---|---|
| Shotgun | Birds, small game, turkey, and deer in some places | Moderate | The most versatile single purchase. A pump or semi-auto in 12 or 20 gauge covers a lot of ground. |
| Rifle | Deer and other big game, and varmints | Moderate | Pick a common, moderate-recoil cartridge and shoot it often. Accuracy comes from practice, not power. |
| Compound or crossbow | Deer and turkey in archery seasons | Steeper | Requires close range and consistent form. Rewarding but takes more practice time. |
| Muzzleloader | Special seasons for deer | Steeper | Slower and more involved. Best after you’re comfortable with the basics. |
Starting with a shotgun
For most beginners, a shotgun is the most flexible first firearm because it can be used for doves, upland birds, rabbits, squirrels, and, with the right load, turkey. A 20 gauge is often easier on new shooters because of lighter recoil, while a 12 gauge offers the widest range of ammunition. Fit matters more than gauge: a gun that fits you will be easier to shoot well.
If waterfowl is on your list, you’ll also need to understand chokes, because the choke you use changes pattern density and how ethically you can take a bird. Our guide on what choke to use for duck hunting goes through that in plain terms.
Starting with a rifle
A bolt-action rifle in a common cartridge is a sensible starting point for deer. Choose something you can shoot comfortably for a whole range session, and pair it with a decent scope you’ve properly mounted and zeroed. Learn to shoot from a rest, from sticks, and from sitting positions, because those are the postures you’ll actually use in the field.
Starting with archery
Archery rewards patience and punishes sloppiness. A beginner-friendly compound bow set to a comfortable draw weight and properly fitted to your draw length is a good choice, and a local archery shop can set it up and teach you the basics. If you use a mechanical release, the type you pick affects consistency and comfort, so it helps to read about the best thumb release for hunting before you buy.
Why start with a shotgun
- One firearm covers many species
- Lots of affordable used options
- Forgiving at short range
Things to keep in mind
- Effective range is limited
- Patterning matters for each load
- Bird shooting takes practice
How to practice
Shoot often, in short sessions, with a purpose. Start from a bench to learn fundamentals, then move to field positions. Add a basic hearing protection and eye protection habit that never lapses. For shotgunners, break clay targets to practice moving shots. For rifle and archery shooters, shoot at the distances you’d actually take in the field, and set a personal limit that you won’t exceed on a live animal.
Build a Starter Kit Without Overspending
Gear marketing is loud. The good news for beginners is that the fundamentals are simple: stay warm and dry, be visible and legal, carry the basics for safety, and stay comfortable enough to keep going. You can add specialty items as you learn what you actually need.
The beginner checklist
- Layered clothing
- Waterproof boots
- Blaze orange hat and vest
- Headlamp
- Knife
- First-aid kit
- Water and snacks
- Map and compass or GPS app
- Gloves
- Wool socks
- Backpack
- Game bags
Clothing: layers beat a single heavy coat
Cold, damp hunters make bad decisions and go home early. Dress in layers that you can add or remove so you don’t sweat on the walk in and freeze on the sit. A moisture-wicking base layer, an insulating middle layer, and a quiet, weatherproof outer shell cover most situations. Cotton is a poor choice because it holds moisture and cools you down.
Your hands and feet deserve special attention. Cold hands make it hard to shoot accurately or handle gear, and cold feet end hunts quickly. A good pair of insulated, flexible gloves can make a real difference, and our roundup of the best hunting gloves covers options for different weather and weapons. For feet, merino wool socks are the standard answer. If you haven’t picked a pair yet, the best hunting socks guide explains what to look for and why it matters.
Footwear and fit
Boots are worth the money more than almost any other item. Match them to your conditions: lightweight and breathable for warm early-season hunts, insulated and waterproof for cold ones. Break them in before opening day. Blisters ruin trips, and a boot that fits well will let you walk farther with less fatigue.
Camouflage and visibility
Concealment matters, but movement discipline and wind matter more. Earth-toned clothing that breaks up your outline is usually enough for beginners, and you don’t need a full pattern-matched wardrobe. Hunter orange rules vary by region and season, so confirm what’s required where you hunt, and wear it with confidence. It exists to keep you alive.
Safety and survival basics
Carry a small first-aid kit, a headlamp with spare batteries, a lighter or fire starter, a whistle, water, and extra food. Tell someone where you’re going and when you expect to be back. A phone with offline maps and a fully charged battery is a real safety tool. These items rarely get used, and the day you need them is the day you’ll be glad you carried them.
Spend where it counts. Buy good boots, socks, and gloves first. Everything else can be modest or secondhand while you figure out how you like to hunt.
Find Land to Hunt and Scout It Like You Mean It
Access is one of the biggest hurdles for new hunters, and also one of the most solvable. There is more huntable land than most beginners realize, and a small amount of research opens a lot of doors. The key is to treat land like a puzzle you can study from a desk before you ever set foot on it.
Public land
State wildlife areas, national forests, and other public lands often welcome hunters. Your state wildlife agency usually publishes maps and regulations for these areas, and many offer online mapping tools. Public land can be crowded in the opening days, so consider hunting weekdays, walking farther than other hunters, or visiting in the shoulder seasons.
Private land
Gaining permission takes humility. Knock on the door in daylight, introduce yourself, explain what you’d like to hunt and when, and offer to follow any rules they set. Bring a thank-you gift afterward. Many landowners say yes to respectful people, especially when the request is simple and the hunter offers to help with something useful, like fence repair or sharing meat.
Use maps and data
Satellite imagery and topographic maps reveal a lot. Look for transitions between habitat types, funnels where terrain narrows, water sources, and thick bedding cover. On the ground, you’ll confirm what you saw on the screen by checking for tracks, droppings, rubs, trails, feathers, and feeding signs. Note wind direction and the likely approach routes, and mark any access points and boundaries so you never stray onto land where you don’t belong.
Scout without a gun
One of the best low-pressure ways to learn a piece of land is to walk it in the off-season. That’s where shed hunting comes in. Looking for dropped antlers gets you into deer country at a time when you won’t spook anything, and it teaches you where animals actually travel and bed. Even if you never pick up a single antler, you’ll learn the property.
Scouting also teaches you your own limits. How long does it take to walk in? How much noise do you make? Where can you wait comfortably? Is there a safe backstop for every shot you might take? Answering those questions before the season makes every hunt calmer.
Plan the Hunt Day: Wind, Timing, and Setup
Hunting success for beginners often comes down to a handful of fundamentals: where the wind is going, when you arrive, how quietly you move, and how still you can be. None of these require expensive gear. They require preparation and discipline.
Wind first, everything else second
Most game animals have a remarkable sense of smell. If your scent blows toward where an animal is bedded or traveling, your hunt is likely over before it begins. Check the forecast the night before, and carry a small puffer of powder or a thread to read the wind while you’re in the field. Plan your approach and your setup so the wind carries your scent away from where you expect animals to be.
Timing and arrival
Early morning and late afternoon are classic hunting windows because many animals are moving to and from feeding and bedding areas. Arrive early enough to settle in before first light, and walk in slowly. A common rookie mistake is rushing to the spot, sweating, and making noise. Slow down, take breaks, and plan to arrive calm.
Sit, stalk, or call
- Sitting: set up near a trail, field edge, or feeding area and wait. This is the most beginner-friendly style, and it rewards stillness.
- Stalking and still-hunting: move slowly with frequent stops. It’s more active and demands excellent wind awareness.
- Calling: used for turkey, waterfowl, and some predators. It’s interactive but takes practice to sound natural.
- Walk-up hunting: common for upland birds and rabbits, often with dogs or a partner.
Elevated setups
Tree stands, ground blinds, and saddles all change how you hunt, and each comes with real safety considerations. If you use any kind of elevated platform, always wear a full-body harness and stay connected from the time you leave the ground until you return to it. Falls from tree stands are among the most common serious hunting injuries, and they’re almost entirely preventable.
Patience and acceptance
Most hunts end without a harvest, and that’s normal. The goal of your first season is to learn. Keep notes about what you saw, where the wind was, and what you’d do differently. Over time, those notes become the most valuable gear you own.
Shot Placement and Recovery: Making It Ethical
The most important skill in hunting is the one that happens in a fraction of a second: deciding whether to shoot, and where. Ethical hunting means taking only shots you’re confident will be quick and humane, and being ready to follow up if something doesn’t go as planned.
Know your limits
Decide ahead of time the maximum distance you’ll shoot, the angles you’ll accept, and the conditions that would make you pass. A calm decision at home is worth more than an excited one in the field. Passing on a marginal shot is not failure, it’s discipline.
Before you shoot
- Positively identify the animal and confirm it’s legal to take.
- Make sure there’s a safe backstop behind it, with no people, buildings, roads, or livestock in the possible line of fire.
- Check that you have a steady rest and a clear lane.
- Take a breath and only then place your finger on the trigger.
After the shot
Stay where you are for a moment and watch carefully. Note where the animal was standing, which way it went, and any sounds you heard. Mark the spot. Then wait as advised in your hunter education materials or by your mentor before you move. Pushing too early can cause an animal to travel farther than it otherwise would.
When you do begin tracking, move slowly and keep your eyes down. Look for blood, hair, tracks, and disturbed leaves. Mark each sign you find so you can retrace your steps and keep your line. If you lose the trail, mark the last sign and search in widening circles. Don’t hesitate to ask for help. Many regions have volunteer tracking groups, some with trained dogs, and a call to an experienced hunter is always worth it.
Tell someone, and follow the law. Recovery rules differ by region, including when you must report a wounded animal or tag a harvest. Check your local regulations so you know your obligations before the season.
Field Care and Getting the Meat Home
For many new hunters, the moment after a successful hunt is both exciting and overwhelming. A calm approach, and a few basic principles, protect the meat and honor the animal. This is also where many beginners benefit most from having a mentor, since field dressing is a skill best learned by watching it done.
The core principles
Meat quality is protected by cooling quickly, keeping it clean, and keeping it dry. Warm weather makes everything urgent, since heat is the fastest way to spoil meat. Cold weather gives you more time, but you should still work promptly. Use clean tools, wear gloves, and keep hair, dirt, and stomach contents away from the meat.
Learn the process from someone who does it
Watching a skilled hunter dress an animal is worth more than any written explanation. Ask your mentor if you can help and observe. Many state agencies and conservation groups also offer field dressing and butchering workshops, and good video resources exist as well. Take your time on your first few animals. Rushing leads to mistakes, and mistakes lead to lost meat.
Moving the animal
Plan how you’ll get the animal out before you pull the trigger. Large game may require a game cart, a partner, or quartering the animal into manageable loads. Bring game bags and plenty of clean towels. If you have to hike out in the dark, bring a reliable headlamp and take extra care with your footing.
Processing at home or with a butcher
You can butcher your own animal with a few good knives, a clean workspace, and patience, or you can take it to a local processor who will turn it into cuts, sausage, jerky, or ground meat. Using a processor is completely normal, especially for the first time. It’s a good way to see how cuts are broken down, and the cost is often modest compared with the value of the meat.
Disease and regulations
Some areas have disease monitoring or special rules about moving carcass parts, and some encourage or require testing. Check local rules before you travel with game. Safe cooking and handling matter too: use a meat thermometer, wash your hands and tools, and keep raw meat separate from other foods.
Cooking your first harvest
Wild game is lean, so it rewards gentle cooking. Roasts and shoulders do well when braised slowly, tenderloins are best kept simple and cooked quickly, and ground meat can go into chili, tacos, and burgers. Sharing the first meal with friends and family is one of the most satisfying parts of the whole experience.
Safety, Ethics, and Being a Good Guest Outdoors
Hunting has an excellent safety record when people follow the rules, and a serious one when they don’t. The habits you build in your first season will stay with you for life, so build good ones from the start.
The four rules of firearm safety
- Treat every firearm as if it were loaded.
- Always point the muzzle in a safe direction.
- Keep your finger off the trigger until your sights are on the target and you’ve decided to shoot.
- Be certain of your target and what is beyond it.
These rules are taught in every hunter education course, and they apply in the field, at the range, and at home. Unload when crossing fences, climbing, or getting in vehicles. Never rely on a safety as a substitute for good habits.
Hunting with others
Talk before you move. Agree on zones of fire, where each person will be, and how you’ll communicate. Wear hunter orange where required, and even where it isn’t, consider wearing it. Know where your partners are at all times, especially in thick cover or when a bird flushes.
Fair chase and respect
Ethical hunters follow the spirit of the law as well as the letter. They take only shots they’re confident in, make every reasonable effort to recover animals, use the whole animal as best they can, and respect the animals they pursue. They also respect other people: landowners, other hunters, hikers, and neighbors. Leave gates as you found them. Pack out trash, including what others left. Don’t park where you block access. Keep your language and behavior in check, because hunters are always representing the whole community.
Know the myths
Hunting culture is full of tall tales and traditions, and some of them are jokes aimed at newcomers. Learn to tell the difference between real tradition and a prank, and don’t be embarrassed when you fall for one. Every hunter does at some point.
Handle the emotions honestly
Many hunters feel a mix of excitement, gratitude, and sadness after a harvest. That’s normal, and it’s often a sign you’re taking the act seriously. Talk about it with your mentor or a friend. Respect, gratitude, and responsibility are at the heart of good hunting.
What Getting Into Hunting Really Costs, and Mistakes to Avoid
Hunting can be as affordable or as expensive as you let it be. The table below shows rough ranges to help you plan, though real costs vary a lot by region, brand, and whether you buy new or used.
| Item | Lean start | Comfortable start | Notes |
|---|---|---|---|
| Hunter education | Low or free | Modest fee | Required in many places for first-time hunters. |
| License, tags, stamps | Basic license | License plus species tags | Varies by residency and species. |
| Firearm or bow | Used or borrowed | New entry-level | Fit and practice matter more than price. |
| Ammunition and practice | A few boxes | Regular range sessions | Practice is the best investment you can make. |
| Clothing and boots | Existing outdoor clothes | Layered hunting system | Prioritize boots, socks, and gloves. |
| Safety and field gear | Basic kit | Full kit with pack and harness | Never skip safety items. |
| Processing | DIY | Local processor | Varies by animal and cuts. |
Ways to keep the cost down
- Borrow or rent gear from your mentor or a club before buying.
- Buy used firearms and bows from reputable local dealers.
- Start with small game and birds, which don’t require as much specialized equipment.
- Hunt public land to avoid lease fees.
- Process your own meat once you’ve learned how.
Common beginner mistakes
What trips people up
- Buying gear before taking the course
- Skipping range practice
- Ignoring wind and scent
- Hunting unfamiliar land alone with no plan
- Taking low-percentage shots out of excitement
- Quitting after one slow season
What works instead
- Course first, shopping second
- Regular practice at realistic ranges
- Plan around wind every time
- Scout ahead and tell someone your plan
- Pass on marginal shots
- Treat season one as a learning year
The most common mistake of all is expecting too much too soon. Hunting is a long game, and most people get better by showing up, paying attention, and being willing to learn. Give yourself permission to be a beginner.
Frequently Asked Questions About Getting Into Hunting
Can I get into hunting if nobody in my family hunts?
Yes. Many adult hunters are first-generation. The path is the same: take hunter education, get licensed, find a mentor through a club, agency program, or friend, and start with a forgiving species. Wildlife agencies and conservation groups run programs specifically for adults who didn’t grow up hunting.
What is the first thing I should do to start hunting?
Look up your state or provincial wildlife agency’s hunter education requirements and sign up for a course. That single step unlocks the license, introduces you to other hunters, and teaches the safety fundamentals everything else is built on.
Do I need hunter education to hunt?
In most places, first-time hunters must complete a hunter education course before buying a license, though rules vary by location and sometimes by age. Check your local wildlife agency for current requirements. Even where it’s optional, the course is worth taking.
What is the easiest animal to hunt for a beginner?
Squirrel, rabbit, and dove are common beginner choices because they’re abundant, seasons are often long, and the gear needed is simple. Turkey and deer are also popular first hunts, especially with a mentor, though they usually require more patience and preparation.
What gun should a beginner buy for hunting?
A pump or semi-automatic shotgun in 12 or 20 gauge is a versatile first choice because it covers birds, small game, and in many cases turkey. For deer, a bolt-action rifle in a common, moderate-recoil cartridge is a typical option. Choose something that fits you and that you’ll practice with often, and consider borrowing before buying.
How much does it cost to start hunting?
It depends on what you hunt and whether you buy new or used. You can begin modestly with a license, a borrowed or used firearm, ammunition for practice, and clothing you already own. Boots, socks, gloves, and safety items are worth prioritizing. Expenses grow if you add archery, specialized blinds, or travel.
Where can I hunt if I don’t own land?
Public lands such as state wildlife areas and national forests are common options, and your wildlife agency typically publishes maps and rules. You can also ask private landowners for permission, join a club with access, or hunt with a mentor who has permission on land they hunt.
Is hunting safe for beginners?
Hunting has a strong safety record when people follow basic rules: treat every firearm as loaded, control the muzzle, keep your finger off the trigger, and identify your target and what’s beyond it. Wearing hunter orange where required and using a harness in any elevated stand reduce risk further.
Can I hunt alone as a beginner?
It’s legal in most places, but your first hunts are much better with a mentor. Experience makes judgment calls easier and safety margins wider. If you do go alone, tell someone your plan and expected return time, carry a charged phone and basic survival gear, and stay on ground you know.
How long does it take to become a competent hunter?
Basic competence in safety and legal knowledge can come within a season, but skill with a particular species usually takes years. Most hunters say they keep learning forever. Focusing on one species and style early on tends to speed things up.
What should I do if I don’t see any animals on my first hunts?
That’s common. Review the wind, your scouting, your arrival time, and how much noise you made. Keep notes, talk with your mentor, and adjust. Many successful hunters log dozens of quiet outings before their first harvest, and those hunts are where the real learning happens.
Do I have to process the animal myself?
No. Many hunters take their harvest to a local processor, especially early on. If you want to learn to do it yourself, ask a mentor to teach you, attend a workshop, and start small. Either way, cooling the meat quickly and keeping it clean is what matters most.
Conclusion: Your First Season Starts With One Small Step
Getting into hunting can look intimidating from the outside, but from the inside it’s a sequence of manageable steps. Decide why you want to do it. Take hunter education and get licensed. Find a mentor. Pick a forgiving first species. Choose a weapon that fits and practice with it. Build a modest kit that keeps you warm and safe. Find land, scout it, and respect the wind. Shoot only when you’re sure, track carefully, and care for the meat. And throughout, be safe, be ethical, and be a good guest.
You don’t have to do everything this season. You just have to start. Sign up for the course, make a call, ask a friend. Most hunters will tell you the same thing: the hardest part was the first step, and it was worth it.
When you’re ready to turn that plan into a kit, the links below make it easy to browse what you need.
You May Also Like
What Is Snipe Hunting?
The classic camp prank explained, plus how it differs from real hunting.
Read the articleWhat Is Saddle Hunting?
A lightweight, mobile way to hunt from trees without a traditional stand.
Read the articleDisclosure: As an Amazon Associate, we earn from qualifying purchases. If you click an Amazon link on this page and buy something, we may earn a small commission at no extra cost to you. Always check your local wildlife agency’s current regulations before hunting.